Friday 27 February 2015

Cotton Candy Ice Cream


Incase you missed it, its Ice Cream Week here at Make Bake Celebrate. Basically on the grounds that its assume to be dependent upon 109 in Texas and the basic considered turning on the broiler makes me recoil. However likewise on the grounds that I had a great time making 7 separate kinds of simple no machine dessert a weekend ago I simply knew they must be imparted immediately! Recently I kicked Ice Cream Week off with some velvety Cherry Pie Ice Cream and today I'm once again with Cotton Candy Ice Cream, a beyond any doubt to be summer top choice! You will have a hard time believing how simple you can throw together some of this at home with only 4 straightforward fixings!


Not at all like the Cherry Pie Ice Cream based off of whipping cream, this dessert is made utilizing Cool Whip and pudding then including a touch of seasoning by including a Duncan Hines Cotton Candy Frosting Creation Packet. In the event that you haven't made any Cool Whip dessert yet, you simply need to attempt it out! I adore how the frozen yogurt is smooth and feathery, yet holds up somewhat better then the standard in hotness.

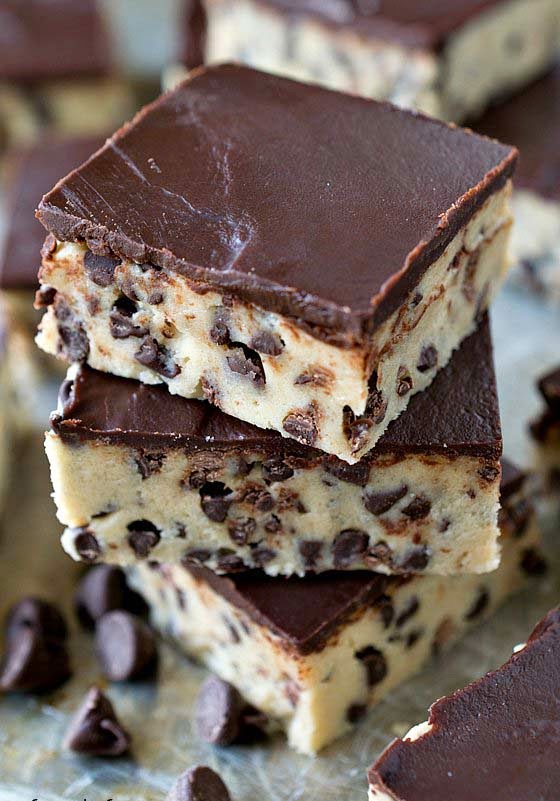
You may also like:Chocolate Chip Cookie Dough Bars

This is what your going to need:

1 8oz.Tub Of Cool Whip

2 3.4oz Vanilla Puddings

2 Cups Milk

2 Cotton Candy Duncan Hines Frosting Creations Flavor Packet

Blue Gel Food Coloring (Optional)

Step 1: In a substantial blending dish, or the dish of an electric blender beat together pudding and milk. Place in cooler for 5 minutes to firm.

Step 2: Once pudding has solidified in ice chest include whole tub of cool whip and 2 Cotton Candy Frosting Creations Packets, beat until completely joined. On the off chance that craved include a tiny bit of blue sustenance shading (gel works best) to help tint the dessert a decent blue. The yellow pudding provides for it a little bit of a green without)


Step 3: Pour dessert into plastic holder (1.5l or greater) with top and place in cooler. Let frozen yogurt sit for no less than 8 hours, overnight is best.

Presently you can appreciate a most loved summer treat, without the sticky fingers!

Need more cotton sweet? Who doesn't! Look at these cotton treat treats:

If you like it then Share it!

Italian Tuna Skillet Casserole Recipe


Spruced up a bit, this exemplary dish is no where close what you would expect in a fish meal its better than anyone might have expected Italian style. The flavors are rich and scrumptious just about Alfredo style however considerably creamier. I adore the  Italian turn we put int this one and the expansion of the fish, peas includes a wealth of flavors. 

Fast and simple to make in a matter of minutes!

Ingredents:

Italian Tuna Skillet Casserole Recipe

1 pound fettuccine
3 tablespoons olive oil extra virgin
4 garlic cloves minced fine
2 cans of Italian tuna packed in olive oil drained
1/2 cup sundried tomatoes or fresh diced plum tomatoes (optional)
1/2 cup Pinot Grigio white wine
1/2 cup heavy cream
1 cup fresh peas or frozen
1/2 cup Romano/Parmesano cheese grated
salt, pepper and red pepper to taste
1 cup chopped fresh basil for garnish

you may also like:Weeknight Italian Pasta Bake
 Method:

Cook the pasta in boiling salt water until al dente.
In a deep non stick skilled saute the garlic for 3 minutes with the extra virgin olive oil. Add the tuna and tomatoes stir to heat them through. Add the wine and cook one minute then add the cream. When bubbles start to form, stir in the cheese, add all seasonings to taste. Fold in the peas and then toss the drained hot pasta with the sauce. Sprinkle with more grating cheese and garnish with chopped basil. 

Thursday 26 February 2015

White Chili with Chicken

White Chili with Chicken


Today's formula for White Chili with Chicken is a delectable, unique formula that we produced for Albertsons Supermarket as a major aspect of their Cans Get You Cooking project.

When you have a decently supplied storeroom with a mixture of canned fixings close by like beans, chicken stock, peppers and chilies, corn and even potatoes – a nutritious and scrumptious feast like our White Chili with Chicken meets up in only minutes!

Our white stew has delicate lumps of chicken in a light soup that is crammed with vegetables and beans! Some included crisp ringer pepper and onion, in addition to a radiant mix of herbs and flavors make this white bean stew with chicken fantastically tasty! We likewise finished the stew with a sprinkle of crisp lime squeeze, some new cilantro, and a touch of harsh cream for a smooth, citrusy note that superbly supplements the zesty high temperature in the bean stew.


You may Also Like:Dino Joannides’s grilled spatchcocked chicken

Canning is one of the most ideal approaches to get sustenance from ranch to table on the grounds that it secures supplements at the crest of readiness hours in the wake of picking.

Including canned leafy foods is an extraordinary approach to add vitamins and minerals to your dinners – in addition to they are helpful to dependably have close by.
Canned nourishments are a savvy choice for encouraging a family on a budget.


Serves:6-8 servings
Prep time:
Cook time:
Total time:
Ingredients
  • 1 pound boneless skinless chicken thighs, cut into bite sized pieces (approximately 2 pounds of bone-in and skin-on chicken thighs will yield 1 pound of useable meat)
  • 1 teaspoon kosher salt
  • ½ teaspoon freshly ground black pepper
  • 2 tablespoons extra virgin olive oil
  • 1½ cups diced onion
  • 1 cup diced orange or yellow bell pepper
  • 1 tablespoon minced garlic
  • ½ teaspoon ground coriander
  • 1 teaspoon dry oregano
  • 1½ teaspoons cumin
  • 1 ½ teaspoons chili powder
  • 2 bay leaves
  • ¼ cup chopped fresh cilantro
  • 2 14.5-ounce cans chicken stock
  • 1 4.25-ounce can diced green chilies
  • 1 14.5-ounce can white cannellini beans with liquid
  • 1 14.5-ounce can red kidney beans, rinsed
  • 1 14.5-ounce can creamed corn
  • 1 14.5-ounce can diced potato, drained
  • 2 tablespoons canned diced jalapeรฑo, any stems and seeds removed
  • 1 pint sour cream
  • Fresh lime juice, tortilla chips, sour cream and cilantro (optional as garnish)
Instructions
  1. Season both sides of chicken pieces with salt and pepper.
  2. In a large heavy bottomed pot, heat oil over high.
  3. Add half of the chicken pieces and brown thoroughly on both sides (3-4 minutes on each side). Remove to a bowl or plate and brown the second batch of chicken in the same manner. Remove that batch and add to bowl with first half.
  4. Lower heat to medium high and add onions and bell peppers. Cook for two minutes and add garlic. Cook for 30 seconds.
  5. Add chicken back in with any juices that accumulate along with coriander, oregano, cumin, chili powder, bay leaves, cilantro, chicken stock, chilies, white beans, red beans, creamed corn, diced potato and jalapeรฑo.
  6. Bring to a boil, lower heat and simmer 10 minutes.
  7. Stir in sour cream and heat to hot but not boiling.
  8. Serve with additional sour cream, additional cilantro, tortilla chips or fresh squeezed lime juice.

Wednesday 25 February 2015

TOLL HOUSE CHOCOLATE CHIP PIE

Growing up, my family’s go-to recipe anytime we made chocolate chip cookies was the classic, original Toll House Chocolate Chip Cookie recipe found on the back of every package of Nestle’s semi-sweet chocolate morsels.
I have tried making many other chocolate chip cookie recipes over the years, and while all of them are delicious.The Toll House recipe is still my favorite one!
So given how much I love those classic chocolate chip cookies, I never thought it could be improved upon. That is – until – I tried today’s recipe for a Toll House Chocolate Chip Pie!

Toll House Chocolate Chip Pie is incredible! It has the classic flavors – a sweet, buttery batter with chocolate chips and walnuts – but in pie form!
As this Toll House Chocolate Chip Pie bakes, it forms almost a crackly top – and when you bite into your slice it’s dense and soft and fudgy with crunch from the chopped walnuts. The first time I made this pie – my Friend eyes rolled into the back of his head as he took his first bite – it is that good!


Toll House Chocolate Chip Pie

Serves:8 servings
Prep time:
Cook time:
Total time:

Chocolate Chip Cookie Dough Bars


Note: Prep time listed does not include time required for refrigerating and cooling these bars.
Ingredients
    For the cookie dough filling
  • 1 stick (1/2 cup) unsalted butter, softened to room temperature
  • ¾ cup light brown sugar, packed
  • 1 teaspoon vanilla extract
  • 2 cups all-purpose flour
  • 1 14-ounce can sweetened condensed milk
  • 2 cups mini chocolate chips
  • For the Ganache
  • 1 cup semi-sweet chocolate chips
  • ¼ cup heavy cream
  • You may Also Like:Whole Wheat Buttermilk Pancakes
Instructions
  1. Start by lining a 9x9-inch or 8x8-inch square pan with a sheet of parchment paper, making sure that the edges of the paper are large enough to extend up the sides of the pan. Set aside.
  2. In the bowl of a stand mixer, beat together the softened butter and brown sugar until light and fluffy. Add vanilla and mix until well combined.
  3. With the mixer on a low speed, alternate adding in the flour and the sweetened condensed milk until all of it has been added and the mixture is completely blended. Fold in the mini chocolate chips by hand until evenly blended.
  4. Press the cookie dough into the prepared pan and press down to spread the dough evenly to the edges. (I found it helpful to put a piece of plastic wrap over the dough while I pressed down.)
  5. Cover the cookie dough with plastic wrap and refrigerate until firm – at least 3 hours or overnight.
  6. The next day, prepare the ganache at least a few hours before serving. In microwave safe bowl, combine the chocolate chips and cream. Heat on high for one minute and stir the chocolate chips and cream together. Continue heating in 30 second increments and stirring after each until the chocolate chips are fully melted and combined with the cream.
  7. Pour the ganache over the cookie dough bars, spreading evenly to the edges of the bars. Chill the bars for a least one hour or until the ganache is set.
  8. When ready to serve, carefully pull up on the edges of the parchment paper and remove the chilled cookie dough from the pan. Using a long knife, cut the dough into bite-sized bars and serve.

Marinated Spiced Carrot Salad

Marinated Spiced Carrot Salad

Serves:6-8 servings
Prep time:
Total time:
Note: We used a spiralizer to cut the carrots, beets and jicama but that is totally optional. A potato peeler works just as well and in fact, that is how we had this served to us. (We were just dying to try our new gadget.) Also note that this salad is best if it marinates for a day or two. The carrots soften up a bit and absorb some of the marinade. Finally, as long as you end up with 1 ½ pounds of peeled vegetables, it doesn’t matter what combination you use. You could use all regular carrots and it would still taste great, just not as colorful.
Ingredients
  • ¾ pound carrots (the commonly found orange variety)
  • ½ pound yellow beets or purple carrots
  • ¼ pound jicama or other hard fresh vegetable, or simply increase the amount carrots
  • 1 whole navel orange
  • ½ cup currants
  • ¼ cup golden raisins
  • ⅓ cup shelled pistachios
  • ¼ cup whole almonds
  • ¾ cup orange juice
  • ¼ cup brown sugar
  • 1 ½ tablespoons honey
  • ½ teaspoon cinnamon
  • ⅛ teaspoon ground cardamom
  • Pinch of dry ginger
Instructions
  1. Start with a large bowl to place the salad ingredients after they are prepped.
  2. Using a spiralizer or carrot peeler, prepare carrots, beets and jicama and add to the bowl.
  3. Peel orange and cut into half sized segments, removing as much pith and seeds as possible and add to the bowl.
  4. Add currants, raisins and pistachios to the bowl.
  5. Crush almonds in mini food processor or chop by hand and add to the bowl.
  6. Add orange juice, brown sugar, honey, cinnamon, cardamom and ground ginger.
  7. Stir and seal in a container mixing around now and then while it marinates. Marinate for 24-48 hours before serving. (Strain excess juice if necessary before serving.)

Weeknight Italian Pasta Bake


You're ten minutes away from popping this delicious Italian pasta dish into the oven. Use the bake time to do something constructive—or nothing at all!


4 servings      Time:prep:10min                             Total:50min

what you need

1
pkg.  (9 oz.) refrigerated cheese tortellini
1/2
cup  boiling water
1
 green pepper, chopped
1
 zucchini, sliced
1-3/4
cups  marinara sauce
1/2
cup  KRAFT Shredded Low-Moisture Part-Skim Mozzarella Cheese

make it

HEAT oven to 375°F.
COMBINE all ingredients except cheese in 13x9-inch baking dish; cover.
BAKE 30 min.; stir. Sprinkle with cheese.
BAKE, uncovered, 10 min. Let stand 5 min. before serving.

kraft kitchens tips

SUBSTITUTE
Prepare using your favorite variety of tortellini or ravioli.
                                             

Autumn Salad

Notes: Up to 1 day ahead, rinse lettuce and radicchio, separate the leaves, and drain. Wrap leaves in a towel, enclose in a plastic bag, and chill to crisp.

Yield:

Makes 8 servings

Ingredients

1/2 cup hazelnuts
Satsuma tangerines (1 1/3 lb. total) 
Medjool dates (1/4 lb. total)
1 tablespoon lemon juice 
1 tablespoon extra-virgin olive oil 
5 cups lightly packed 3-inch pieces rinsed and crisped butter lettuce (see notes)
3 cups lightly packed 3-inch pieces rinsed and crisped radicchio
Salt and pepper 

Preparation

1. Put hazelnuts in an 8- or 9-inch pan. Bake in a 350° oven until golden beneath skins, 12 to 15 minutes. Pour onto a towel; let cool. Rub nuts in towel to remove loose skins. Lift nuts from towel and reserve; discard skins.
2. Grate 1/2 teaspoon peel from 1 tangerine. Cut tangerine in half and ream 1/4 cup juice; use another tangerine if necessary. Put peel and juice in a wide, shallow bowl. Peel remaining tangerines. Pull each apart into halves. Cut halves crosswise into 1/4-inch-thick slices. Add to bowl. Pit dates and quarter lengthwise. Add dates, lemon juice, and olive oil to bowl.
3. Add lettuce and radicchio to bowl, mix, and add salt and pepper to taste. Sprinkle with hazelnuts.

Whole Wheat Buttermilk Pancakes


Yield:


6 servings (serving size: 2 pancakes, 2 tablespoons syrup, and 1 1/2 teaspoons butter)

Ingredients

3/4 cup all-purpose flour 
3/4 cup whole wheat flour 
3 tablespoons sugar 
1 1/2 teaspoons baking powder
1/2 teaspoon baking soda
1/2 teaspoon salt 
1 1/2 cups low-fat buttermilk
1 tablespoon vegetable oil 
large egg 
large egg white 
Cooking spray
3/4 cup maple syrup
3 tablespoons butter 

Preparation

Lightly spoon flours into dry measuring cups; level with a knife. Combine flours, sugar, baking powder, baking soda, and salt in a large bowl, stirring with a whisk. Combine buttermilk, oil, egg, and egg white, stirring with a whisk; add to flour mixture, stirring just until moist.
Heat a nonstick griddle or nonstick skillet coated with cooking spray over medium heat. Spoon about 1/4 cup batter per pancake onto griddle. Turn pancakes over when tops are covered with bubbles and edges look cooked. Serve with syrup and butter.

Note:

 
Keep cooked pancakes warm in a 200ยบ oven while preparing remaining pancakes, then serve them with heated maple syrup.